User Tools
Site Tools
LCD module data
Numeric
Character
Mixed
- ≡ Uniden FP203 ✘
- ≡ Uniden FP204 ✘
- ≡ VIP89Z G-Code ✘
Graphic
key: ≡ parallel, ↔ serial, ~ LVDS, _ unknown, ✘ discarded as not useful
Published 2 Apr 2018
Reusing Liquid Crystal Displays
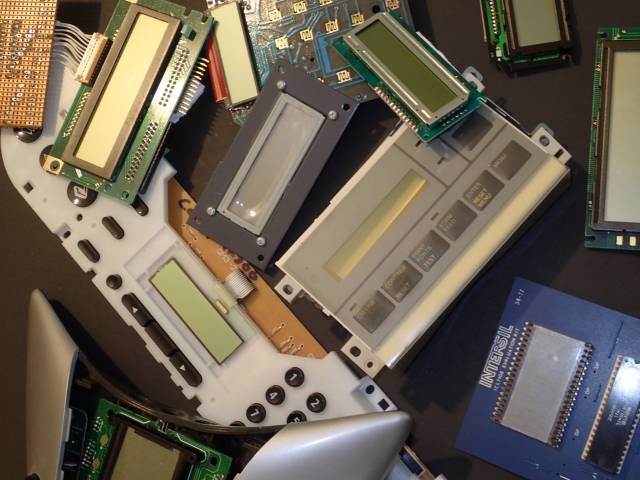
I have lots of LCD (liquid crystal display) modules, recovered from various scrapped devices, that I wish to use in Arduino projects. They vary from one line character displays to multi line pixel displays.
Overview
Many devices use LCD displays for status and other short messages to the user. These are often mounted on separate PCB boards as the display is remote from the main electronics, typically at the top, front of the device. This makes them useful as the whole module, with driver electronics, can be easily extracted and adapted for other uses.
One of the main difficulties with re-using them is simply having the right type of connector - many old (eg 1980's) devices had relatively large connectors with 0.1” pin spacing which was easy to solder a header to, modern devices often have tiny pin spacing and obscure/unobtainable connectors that are difficult to connect to. So it is worth extracting connecting cables and connectors at the same time as the LCD modules when recovering them from scrapped devices.
The second problem is working out the pin assignments of the connectors. Again it saves a lot of time if you examine the scrapped device as you extract the LCD module, and determine which are the power supply lines, and their voltage. If driver chips are identifiable then you can sometimes trace their pins to the edge connector to find some of the pin assignments, but often modern modules have epoxy covering the chip or the have the chip mounted directly on the LCD substrate.
Older devices are usually just straight alpha/numeric (often with choices of character set), and maybe dot addressable pixels or user definable characters. Often there will be a back-light element, either fluorescent or LED. As technology improved the trend was towards customised display elements (eg icons, and logos) as well as text, which might limit their general re-usability. Recent devices tend to have full colour pixel addressable displays giving maximum flexibility, but increasing driving complexity.
Recovered LCD modules
On the sidebar there is a list of LCD modules that I have recovered from various pieces of scrap equipment and the linked pages include pinouts and whether there is an Arduino driver for them.
LCD types
TN (Twisted Nematic) Nematic liquid crystal that twist 90º when power is applied, blocking polarised light transmission.
STN (Super Twisted Nematic) The liquid crystals are twisted by 210º to 270º and untwist when power is applied. This wider transition region allows for gray scale displays (rather than just on/off). They may use reflective lighting for viewing in sunlight. Uses less power than TN displays.
FSTN (Film Compensated Super Twisted Nematic) Uses a compensating film layer between the STN display and rear polariser to increase sharpness and contrast.
Positive displays have dark pixels on a light background. Ambient lighting or a backlight can be used, multiple background colors are possible.
Negative displays have light pixels on a dark background. A backlight must be used for this type of display, multiple background colors are possible.
Transmissive LCDs always require a backlight and provide the highest brightness display. Most suitable where viewing in direct sunlight is not required.
Reflective LCDs have no backlight, and are most suited to environments with high ambient light levels.
Transflective LCDs have both reflecting and transmitting properties and can be viewed in direct sunlight and with a backlight for low light environments.
Common LCD module pinouts
| 1 | Gnd | Gnd | Gnd | Gnd | Gnd |
|---|---|---|---|---|---|
| 2 | Vdd | Vdd | Vdd | Vdd | Vdd |
| 3 | V0 | V0 | V0 | V0 | RS |
| 4 | RS | Reset | RS | RS | R/W |
| 5 | R/W | RS | R/W | R/W | E |
| 6 | /E | R/W | /E | /E | DB0 |
| 7 | DB0 | E | DB0 | DB0 | DB1 |
| 8 | DB1 | DB0 | DB1 | DB1 | DB2 |
| 9 | DB2 | DB1 | DB2 | DB2 | DB3 |
| 10 | DB3 | DB2 | DB3 | DB3 | A |
| 11 | DB4 | DB3 | DB4 | ||
| 12 | DB5 | DB4 | DB5 | ||
| 13 | DB6 | DB5 | DB6 | ||
| 14 | DB7 | DB6 | DB7 | ||
| 15 | A | DB7 | |||
| 16 | K |
Key:
Gnd : Ground, Vdd : +3.3V or +5V, VO : Contrast, RS : Instruction/Data, R/W : Read/Write, E : Device select, DB0–7 : Data bus, A : Backlight +ve, K : Backlight ground
Common I2C LCD pinouts
| Pin | Label |
|---|---|
| 1 | Vout |
| 2 | Cap1N |
| 3 | Cap1P |
| 4 | Vdd |
| 5 | Gnd |
| 6 | SDA |
| 7 | SCL |
| 8 | Reset |
Key:
VOUT DC/DC voltage converter. Connect a capacitor between this terminal and VIN when the built-in booster is used. , CAP1N, CAP1P For voltage booster circuit(VDD-VSS) External capacitor about 0.1u~4.7uf, VDD 3/5V, SDA and SCL (also the - I2C bus lines, SDA/SCL, are open drain and so need pullup resistors to the I2C bus power line ).
Common SPI LCD pinouts
| Pin | Label |
|---|---|
| 1 | Data |
| 2 | SCK |
| 3 | STB |
| 4 | V0 |
| 5 | Vdd |
| 6 | Gnd |
Key:
Data : Serial data, SCK : SPI clock, STB : Strobe, V0 : Contrast, Vdd : +3.3V or +5V, Gnd : Ground
Determining pinout
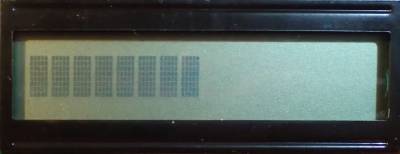
The first thing to do is determine the power supply pins. Ground is often connected to the LCD frame. Care should be taken if it is suspected to require a 3.3V power supply, most old LCDs only run off 5V. If the LCD is from old equipment, examining that circuit is the easiest way to determine the power requirements. If you just connect the power and 'contrast' supplies you will usually get a display of some character cells as solid blocks:
If nothing is displayed while applying a 'contrast' voltage between 0 and 5V, try a negative voltage, maybe -3V to a maximum of -12V but with current limiting to a few milliamps in case you've got it wrong. A hint that a negative supply is needed is the board having pads for and additional 8 pin IC (a charge pump negative supply). (If the chip is actually present, then there is probably a negative supply generated on board that can be applied to the 'contrast' input.
References and Additional Resources
LCD module Drivers
- Driver for METP0000, NEC µPD7225 based LCD display panel.
- Driver for NEC upd7228 and uPD16434 LCD based display panels.
- Driver for native SPI interfaced LCD display panels.
- Driver for Toshiba T6A34 based LCD display panels.
- New LiquidCrystal, higher speed driver for HD44780.
LCD module Datasheets
- Collection of LCD Controller Datasheets, data on a wide range of LCD controllers from ASLIC to Wuxi.
- Pollin LCD Roundup (German).
- AV-Display Shenzhen AV-Display Character LCDs
- Data Vision LCD Datasheets
- IDS (Intelligent Display Solutions LCD Datasheets
- Newhavendisplay LCD controllers
- SDEC Archived modules.
LCD module naming/numbering/code scheme/systems
- Shenzhen AV-Display LCD naming system
- Data Vision LCD naming system
- YES Optoelectronics LCD naming system 1)
Nokia Cellphone LCDs
Page Tools
 Except where otherwise noted, content on this wiki is licensed under the following license: CC Attribution-Share Alike 3.0 Unported
